How to Pack Your Haul a Day in Two Regular Sized Boxes

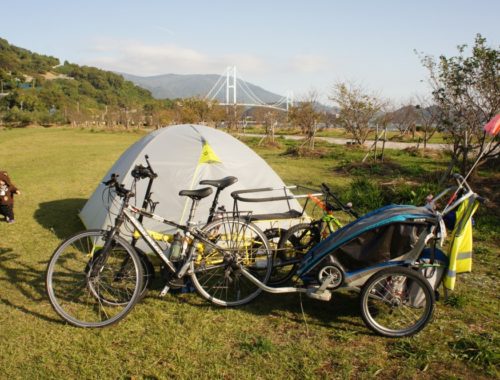
Recently we bought a Bike Friday Haul a Day cargo bike and cycle toured with it in Greece for five weeks. We flew with United Airlines, which wanted to charge us $200 per bike, per direction. I knew that the Haul a Day frame can be dismantled, so I was curious if our bike could fit into two regular boxes or suitcases. This would allow us to avoid the outrageous bike fees.
When we ordered our bike from Bike Friday, I asked them if they could ship it to us in two regular sized boxes. As I have experienced in the past, they make an effort to help their customers out, and they happily obliged (thanks Bike Friday!). When I assembled the bike, it took me a long time, even with some helpers. I figured it would still fit in the boxes if I dismantled it a bit less, to save some time and effort. It’s also time consuming to figure out what kind of boxes to get and how to pack the bike inside them. With this in mind, here are step by step instructions that should allow you to pack your Haul a Day like we did.
Some Notes
Note that the Haul a Day is an evolving bike, and also that it has all sorts of optional add-ons. The instructions below work well for our bike, a January 2019 vintage, with the young rider add-on. For an older or newer bike, there might be some variations.
We also own the basket and front rack, which are super useful for the city. For a lightweight tour we didn’t take them with us. It should be trivial to fit the front rack in these same boxes. The basket won’t fit, but you can take it as a carry on – just put your stuff inside it! (I’ve done this and had no issues)
You might want to refer also to the Haul a Day manual. I found the manual to be useful, although it is more geared towards assembly from an almost assembled bike, as the Haul a Day usually comes. Also, see the gallery at the end for more photos of the disassembly process that should hopefully make things clearer.
Tools/Materials Needed
- Two cardboard boxes measuring 10” x 20” x 30”
- A #10 wrench – for the two nuts securing the rear bars (assuming you have the Young Riders Family Package)
- A #14 wrench – for the two nuts securing the frame (only for newer frames)
- A #15 wrench – for pedals, some might require only an Allen key
- A set of metric Allen keys – various uses
- A giant 5/16 Allen key – for the four screws securing the frame. Note: not present on most multi-tools, but does come with the bike
- 2 cable ends – for the rear gear and brake cables (optional)
- Padding materials – for padding the frame and other parts in the boxes. You might use some of your other gear, such as clothing, and/or random bits of cardboard, bubble wrap, and scrunched up paper
- Tape – for keeping parts together and to tape up the boxes. Ideally get the see-through kind so that your contact info can be seen even if taped over (see below)
- A marker – I suggest to write your name, phone number and email in a few places on the box
- Grease – consider applying a thin coat of grease wherever two metal pieces touch, either when disassembling or assembling

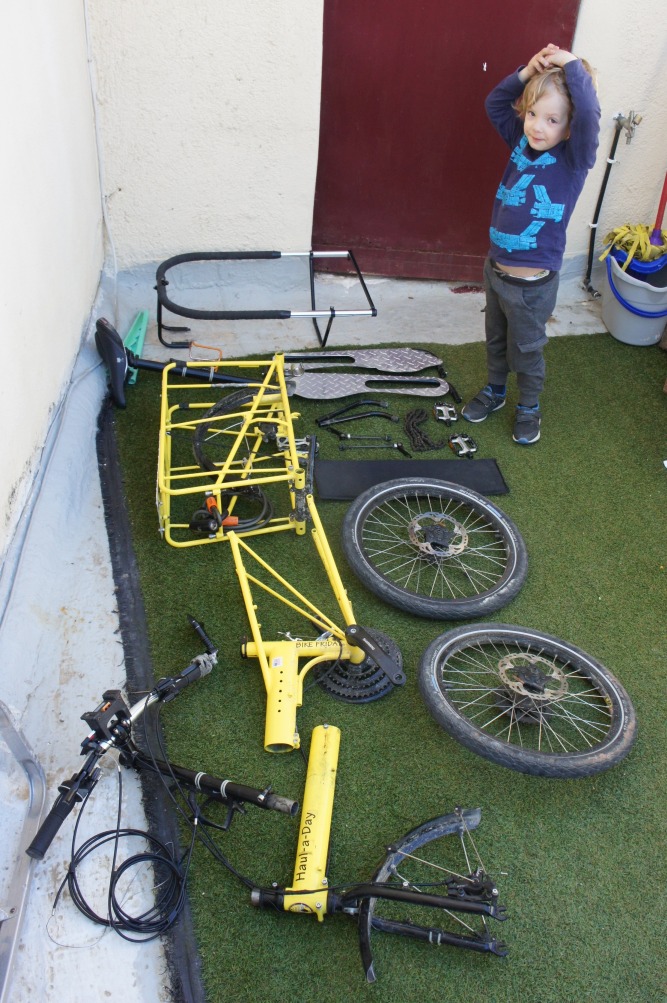
Instructions for Disassembly
- Remove Chain – with the bike standing on the kickstand, find the chain’s quick link and compress it with your fingers to open it. This can be a little tricky, especially if you haven’t done it before or if your chain is corroded. A possible alternative is to use long-nosed pliers. Once you’ve successfully opened the quick link, remove the chain from the bike, and re-close the quick link (to avoid losing it).
- Release Rear Cables – take note of how the rear cables are routed – this will make assembly easier later. Release the rear gear and brake cables by unscrewing the respective screws on the rear derailleur and rear brake. Remove the cable ends, and pull each cable out, then re-screw the respective screws, to make sure they don’t fall out. I’d recommend putting a cable end on each cable at this point, to avoid fraying the cables and to make it harder for the cables to slip back into the housing. If a frayed cable does slip back into the housing, it might not be possible to push it back through. Then you’d potentially need to cut or even replace the cable, so save yourself the trouble. Pull each cable and its housing together through the frame back to the handlebars. Coil each of the cable and housing pairs into a neat coil and tie down with tape.
- Remove Pedals – unscrew the pedals with a #15 wrench (or a hex, for some pedals). Recall that the left pedal is reverse threaded. If there are washers, affix them to the pedals with tape or zip ties.
- Remove Young Kids Add On – remove the cushion and re-close the Velcro to protect it. Remove the rear bars by removing the six screws that affix the brackets for the rear bars. Remove the footrests using the buttons, first the front and then the back.
- Remove Seat – lower the seat via the top screw, and then remove the whole seat post via the lower screw.
- Remove Ends of Kickstand – put the bike down on its right side, leaving the frame-length screws and quick release skewers accessible. Fold the kickstand up first, then remove the legs. To remove the one that is underneath the bike, hold the bike up or lean it on something.
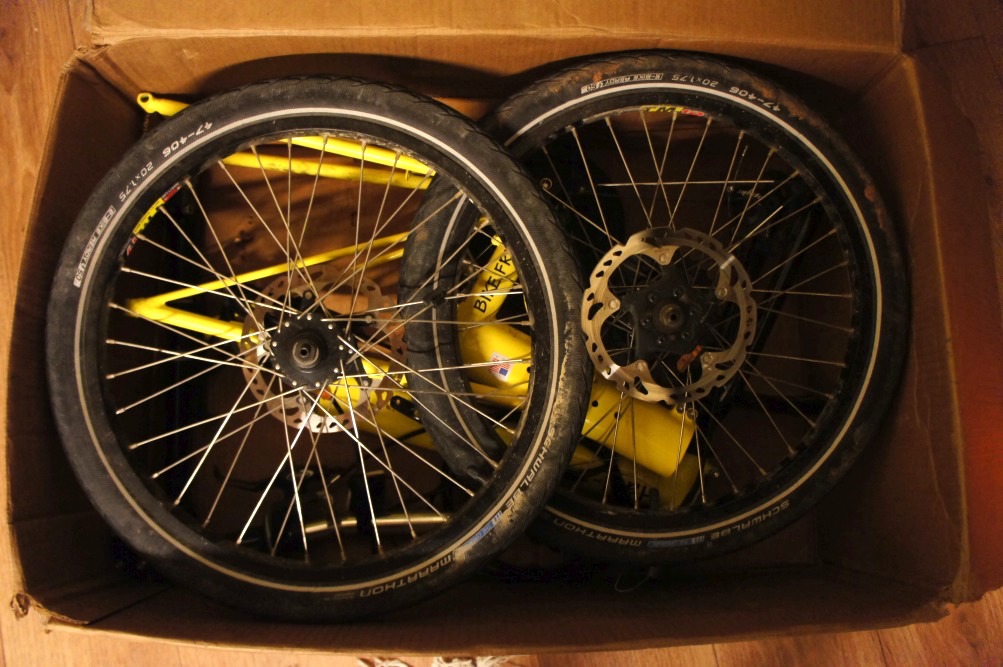
- Remove Wheels – remove both wheels and take out the quick releases. Re-screw the quick releases and put them aside with the pedals and chain. Be careful not to lose the springs, they are reportedly not critical, but easy to lose. Remove some air from the tires, but not all. This isn’t strictly necessary for flying, but some airport handlers or airlines might insist, plus they take up less room this way. Leaving some air in means that they can act like shock absorbers in the box.
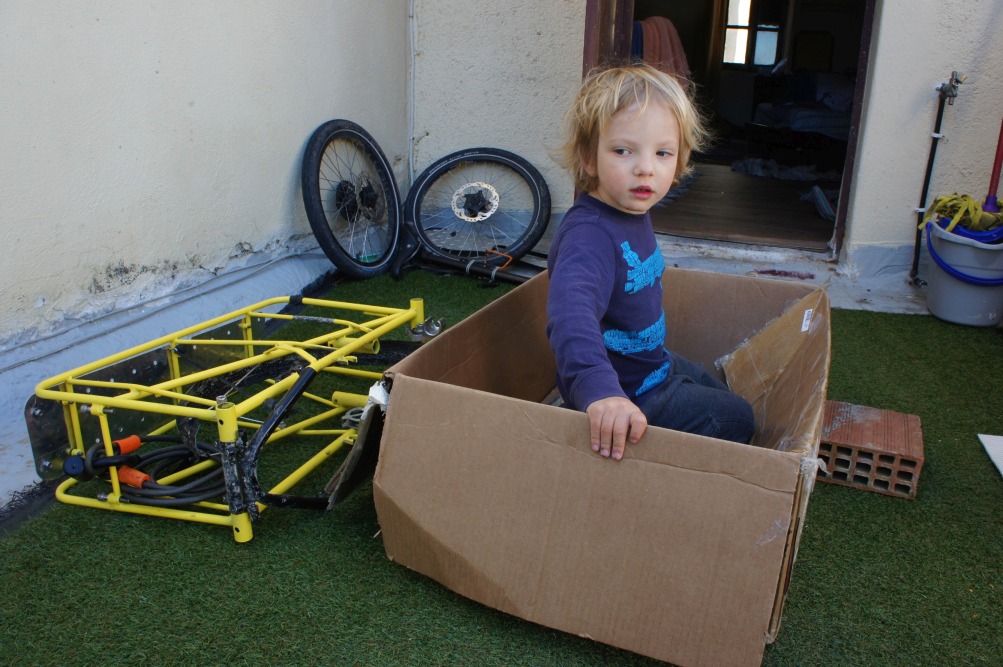
- Remove Rear – remove the rear third of the frame by removing four large screws. This is easier if you open out the kickstand. Replace all the screws and nuts.
- Release Front – release the front third of the frame from the middle third of the frame via three screws in the newer frames or two screws and a button in the older frames.
- Remove Stem Riser – lower the handlebars and then remove the stem riser. Make sure to unscrew the correct screws (out of the three). The top screw is for lowering the stem riser, and the middle screw is for removing it. The bottom screw should not be touched at this point, since it is used only for adjusting the tightness of the headset. Remove the handlebars from the stem and replace the screws.
- Pack Box 1 – place the rear third of the bike in the 1st box. Move the mid-bracket on the rear bars to the back of the rear bars by loosening (but not removing) two screws. Then hook the front of the bar over the rear of the frame and then place in box neatly (see photo in gallery which should clarify this). Place the seat and the seat mast inside the rear frame section, and the cushion and footrests on top.
- Pack Box 2 – place the front and middle of the bike, the stem riser, and the handlebars in the 2nd box. Arranging is a bit finicky. You want to make it as compact as possible to leave room for the wheels on top. Place the wheels in the same box, first the rear wheel with the cassette facing down, then the front wheel with the disc facing down.
- Add Padding – add lots of padding as you see fit, in particular where two metal pieces touch each other, as well as to protect the rear derailleur and the rotors, and around the cassette. I used a combination of bubble wrap, scrunched up paper, and cardboard, in addition to stuffing in some of our clothing.
- Seal and Reinforce – write your name, phone number and email address in a few places on each box, and then seal and reinforce the boxes. Note that at the airport they might ask to open them. If they ask what’s inside, it might be better not to admit it’s a bike, perhaps saying that the boxes contain “bike parts” or “a mobility device”.
Notes for Assembly
When assembling the bike, one can more or less follow the above instructions in reverse. I find assembly to be more intuitive and easier than disassembly. If you didn’t grease up the bike when disassembling it, consider doing it now. You will need two cable ends for the rear cables, and will need to tune the rear brake and derailleur. In addition, you will obviously need a pump if you let out any air on disassembly. If you need to replace the rear cables at this point or during your trip, note that we discovered that the two rear cables are longer than the standard bike cables – you might want to obtain some and carry spares.
Final Words
Finally, these instructions worked well for us, but I’d imagine they could be improved. If you have any suggestions, improvements or corrections, please post your comments below. Similarly, we’d love to hear from you if you have any additional tips or tricks related to packing a Haul a Day.